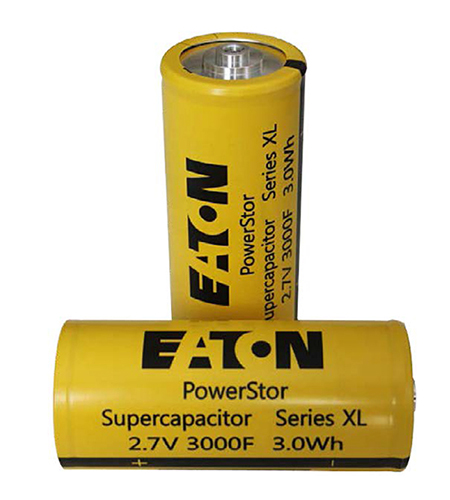
Στον συνεχώς εξελισσόμενο κόσμο της ηλεκτρονικής, οι πυκνωτές έχουν γίνει οι αφανείς ήρωες, συμβάλλοντας σιωπηλά στην αποδοτικότητα και την αξιοπιστία διαφόρων ηλεκτρονικών συσκευών. Η ACPNUMEN, ένα κορυφαίο όνομα στη βιομηχανία πυκνωτών, βρίσκεται στην αιχμή της καινοτομίας, προσφέροντας προηγμένες λύσεις που καλύπτουν τις ποικίλες ανάγκες της σύγχρονης τεχνολογίας. Με έντονη εστίαση στην ποιότητα, οι πυκνωτές της ACPNUMEN έχουν σχεδιαστεί για να πληρούν τις αυστηρές απαιτήσεις της σημερινής αγοράς ηλεκτρονικών, καθιστώντας τους προτιμώμενη επιλογή για βιομηχανίες όπως η επικοινωνία, ο εξοπλισμός τηλεπικοινωνιών, η αυτοκινητοβιομηχανία, ο βιομηχανικός έλεγχος και τα ψηφιακά κυκλώματα.
Ένα από τα κύρια χαρακτηριστικά των πυκνωτών ACPNUMEN είναι η ικανότητά τους να αντέχουν σε σκληρές περιβαλλοντικές συνθήκες διατηρώντας παράλληλα βέλτιστη απόδοση. Οι πυκνωτές από την ACPNUMEN είναι σχεδιασμένοι να αντέχουν σε υψηλές θερμοκρασίες, υγρασία και δονήσεις, καθιστώντας τους ιδανική επιλογή για εφαρμογές όπου η αξιοπιστία είναι πρωταρχικής σημασίας. Επιπλέον, η δέσμευση της ACPNUMEN για βιωσιμότητα αντικατοπτρίζεται στη χρήση οικολογικών υλικών στη διαδικασία παραγωγής, διασφαλίζοντας ότι τα προϊόντα της εταιρείας είναι όχι μόνο υψηλής απόδοσης αλλά και περιβαλλοντικά υπεύθυνα.

Πολλές βιομηχανίες απαιτούν υψηλής ποιότητας πυκνωτές; εδώ είναι που έρχεται η ACPNUMEN. Προτεραιότητά μας είναι να διασφαλίσουμε ότι προσφέρουμε εξατομικευμένες λύσεις πυκνωτών για τις αγορές επικοινωνίας, τηλεπικοινωνιακού εξοπλισμού, αυτοκινητοβιομηχανίας, βιομηχανικού ελέγχου και ψηφιακών κυκλωμάτων. Με την πάροδο των ετών, η εταιρεία έχει αποκτήσει φήμη ως αξιόπιστος προμηθευτής πυκνωτών λόγω της εκτενούς εμπειρίας της στη βιομηχανία.
Οι πυκνωτές ACPNUMEN είναι σχεδιασμένοι να επιδεικνύουν ανώτερη απόδοση διατηρώντας παράλληλα σταθερή ποιότητα. Εκτιμούμε ότι για την συγκεκριμένη εφαρμογή σας χρειάζεστε τον σωστό τύπο πυκνωτή, γι' αυτό η αφοσιωμένη ομάδα μας συνεργάζεται στενά με τους πελάτες ώστε να μπορούν να δημιουργήσουν εξατομικευμένες απαντήσεις. Σκοπός μας είναι να παρέχουμε στους πελάτες μας προϊόντα που έχουν τη δυνατότητα να αντέχουν σε σκληρές συνθήκες λειτουργίας. Αυτή η δέσμευση για τελειότητα μας έχει βοηθήσει να κερδίσουμε την εμπιστοσύνη των πελατών μας, οι οποίοι πάντα επιστρέφουν για περισσότερα.
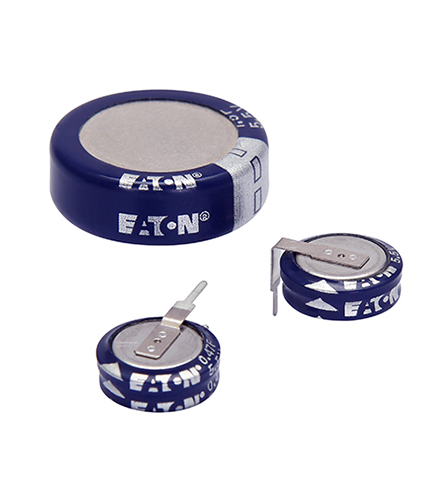
Υπάρχουν τόσες πολλές μάρκες στη βιομηχανία ηλεκτρονικών εξαρτημάτων, αλλά καμία από αυτές δεν έχει επιτύχει ό,τι έχει επιτύχει η ACPNUMEN. Αυτή η εταιρεία κατασκευάζει και προμηθεύει πυκνωτές υψηλής ποιότητας και θεωρείται επωνυμία στον τομέα. Εκτιμώνται ιδιαίτερα ως ο πιο περιζήτητος κατασκευαστής πυκνωτών για επιχειρήσεις που χρειάζονται συνεπή και αποτελεσματικά ηλεκτρονικά.
Αναγνωρίζουμε ότι η προσαρμογή είναι το κλειδί για να καλύψουμε τις ποικίλες ανάγκες των πελατών μας εδώ στην ACPNUMEN. Προσφέρουμε διάφορες κατηγορίες προϊόντων ως κατασκευαστές πυκνωτών. Οι πυκνωτές μας δημιουργούνται με γνώμονα τη βελτίωση της απόδοσης, την ενίσχυση της αξιοπιστίας και την ενεργειακή αποδοτικότητα, είτε πρόκειται για εξοπλισμό επικοινωνίας, οχήματα ή βιομηχανικά συστήματα ελέγχου. Αυτό διασφαλίζει ότι παράγουμε πυκνωτές που πληρούν όλες τις πιθανές απαιτήσεις αυτού του τμήματος της αγοράς, εφαρμόζοντας σύγχρονα σχέδια στις διαδικασίες παραγωγής μέσω των τεράστιων επιπέδων εμπειρίας μας και της σύγχρονης τεχνολογίας.
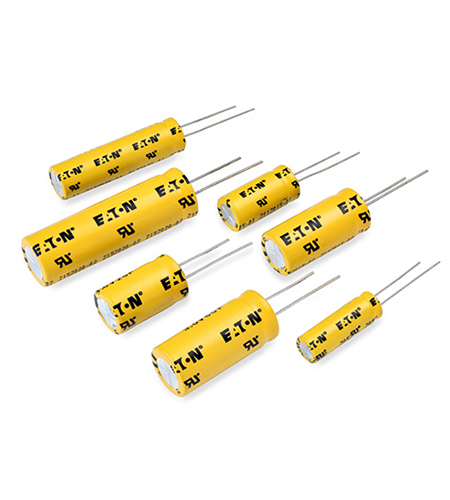
Η ACPNUMEN ξεχωρίζει ανάμεσα στους κατασκευαστές υψηλής ποιότητας πυκνωτών στους ταχύτατους τομείς της επικοινωνίας και των βιομηχανικών συστημάτων ελέγχου. Αυτές οι συσκευές κατασκευάζονται με απόλυτη ακρίβεια για να αποφεύγονται τυχόν αποκλίσεις ακόμη και σε σκληρές συνθήκες. Οι πυκνωτές της ACPNUMEN παίζουν σημαντικό ρόλο σε αυτόν τον τομέα μέσω της εστίασής τους στη βελτίωση της λειτουργικής αποτελεσματικότητας και της αξιοπιστίας για τον εξοπλισμό επικοινωνίας, τηλεπικοινωνιών, αυτοκινητοβιομηχανίας και ψηφιακών κυκλωμάτων.
Ωστόσο, δεν μπορεί να υπάρξει καμία υποχώρηση στην ποιότητα των πυκνωτών που χρησιμοποιούνται σε εξοπλισμό επικοινωνίας και τηλεπικοινωνιών. Για τους πυκνωτές της ACPNUMEN, κατασκευάζονται για να διασφαλίσουν ότι υπάρχει σταθερή μετάδοση σήματος, χαμηλή διαρροή ρεύματος καθώς και υψηλή διατήρηση χωρητικότητας, ώστε οι χρήστες να απολαμβάνουν ομαλές συνδέσεις και να επιτυγχάνουν την καλύτερη απόδοση. Παρέχουν συνεπή απόδοση σε διάφορες συνθήκες λειτουργίας, είτε πρόκειται για ένα προηγμένο smartphone είτε για πολύπλοκες υποδομές τηλεπικοινωνιών.
Αντίθετα, όταν ασχολούμαστε με ηλεκτρονικά αυτοκινήτων ή τον τομέα ελέγχου βιομηχανίας, οι πυκνωτές ACP NUMEN έχουν σχεδιαστεί για να είναι αξιόπιστοι και ανθεκτικοί ώστε να αντέχουν σε τέτοιες σκληρές συνθήκες όπως αυτές που βρίσκονται σε χώρους παραγωγής. Τα προϊόντα μας έχουν αναπτυχθεί για να καλύπτουν ακραίες θερμοκρασίες, δονήσεις και διακυμάνσεις τάσης όπως απαιτείται από τα βιομηχανικά πρότυπα. Αυτό θα μειώσει τον χρόνο διακοπής που προκύπτει από την αυξημένη αποδοτικότητα καθώς και την αυξημένη ασφάλεια που θα επηρεάσει θετικά την παραγωγικότητα εάν οι κατασκευαστές επιλέξουν αυτούς τους συγκεκριμένους πυκνωτές.
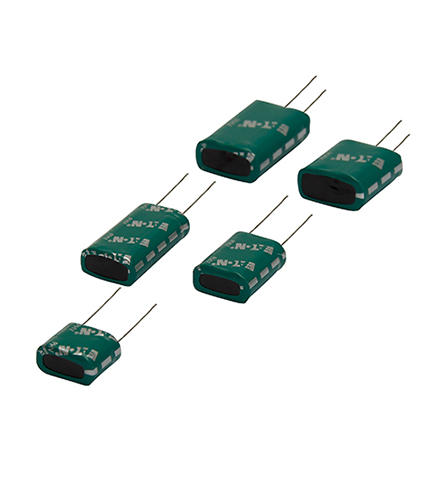
Οι πυκνωτές είναι αναπόσπαστοι σε διάφορες βιομηχανίες, όπως η επικοινωνία, ο εξοπλισμός τηλεπικοινωνιών, η αυτοκινητοβιομηχανία, ο βιομηχανικός έλεγχος και τα ψηφιακά κυκλώματα στον ταχέως μεταβαλλόμενο κόσμο της τεχνολογίας. Αυτή τη στιγμή, η ACPNUMEN ηγείται μεταξύ των εταιρειών που προμηθεύουν πυκνωτές υψηλής ποιότητας που μπορούν να καλύψουν τις ποικίλες ανάγκες των πελατών από αυτούς τους τομείς.
Ως αναγνωρίσιμος brand σε αυτόν τον τομέα, γνωρίζουμε τη σημασία της κατασκευής πυκνωτών που θα είναι αξιόπιστοι, αποτελεσματικοί και μακράς διαρκείας χρησιμοποιώντας προοδευτική τεχνολογία. Διαρκώς παρακολουθούμε τις πιο σύγχρονες εφευρέσεις και τις εφαρμόζουμε στα προϊόντα μας. Έτσι, προσφέρουμε πυκνωτές που έχουν εξαιρετική απόδοση για κάθε πελάτη ώστε να επιτύχει τους στόχους του αποτελεσματικά.
Η ACPNUMEN έχει αρκετά μοναδικά χαρακτηριστικά που την διακρίνουν από τους ανταγωνιστές, αλλά η ποιότητα είναι ένα από αυτά. Για την κατασκευή των πυκνωτών μας χρησιμοποιούμε μόνο πρώτες ύλες κορυφαίας κατηγορίας, επιτρέποντάς τους να λειτουργούν υπό τις πιο σκληρές συνθήκες. Επιπλέον, κάθε πυκνωτής υποβάλλεται σε μια αυστηρή διαδικασία δοκιμών που περιλαμβάνει διαδικασίες επαλήθευσης για να διασφαλιστεί η συμμόρφωση με τα καθορισμένα πρότυπα ποιότητας. Ο τελικός μας στόχος είναι η εξασφάλιση μακροχρόνιων σχέσεων με πελάτες που βασίζονται σε εμάς για ποιοτικούς πυκνωτές.

Η ACPNUMEN ιδρύθηκε το 1998, η ομάδα είναι ένας ολοκληρωμένος πάροχος υπηρεσιών που επικεντρώνεται σε προϊόντα ηλεκτρονικής ισχύος. Έχει υπογράψει συμφωνία συνεργασίας με την Eaton Bussmann, μία από τις 500 κορυφαίες εταιρείες Fortune στις ΗΠΑ! Αυτή τη στιγμή, η εταιρεία επικεντρώνεται στην επικοινωνία, τον εξοπλισμό τηλεπικοινωνιών, την αυτοκινητική ηλεκτρονική, τον βιομηχανικό έλεγχο, τα ψηφιακά κυκλώματα και άλλους τομείς. Από την ίδρυσή της, πάντα πιστεύαμε ότι: Η ποιότητα είναι η βάση της επιβίωσης της επιχείρησης, η φήμη καθιστά την ανάπτυξη συνεχόμενη, η καινοτομία κάνει την επιχείρηση λαμπρή.
Έχουμε αποκτήσει πολλά δικαιώματα προσφοράς ενδιαφέρουσας μάρκας, όπως Eaton Bussmann, On-Bright, Littelfuse, Conquer, Sino fuse, Allen-Bradley, Aupo, Wago, Sanyou και άλλες.
Διαθέτουμε 26 χρόνια εμπειρίας στην προστασία κυκλωμάτων.
Υπηρεσία 24 ώρες την ημέρα, Γρήγορη απάντηση μέσα σε 2 ώρες.
100% πρωτότυπα προϊόντα μάρκας, 100% εγγύηση ποιότητας, πλήρεις πιστοποιήσεις.
26
Apr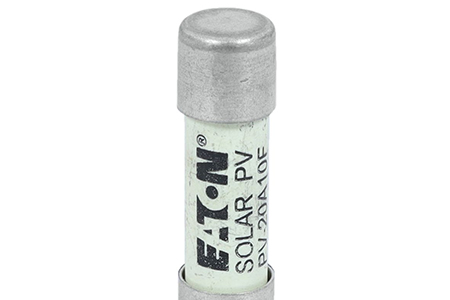
26
Apr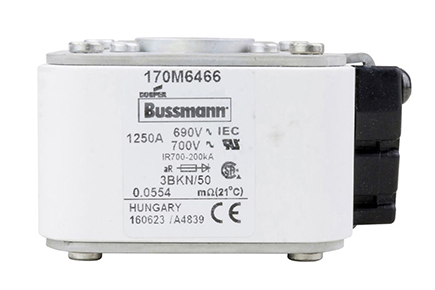
26
AprΈνας ηλεκτρονικός πυκνωτής είναι ένα ηλεκτρονικό στοιχείο που αποθηκεύει και απελευθερώνει ηλεκτρική ενέργεια. Χρησιμοποιείται σε διάφορα ηλεκτρονικά κυκλώματα για τη σταθεροποίηση της τάσης, το φιλτράρισμα θορύβου και την προσωρινή αποθήκευση ενέργειας.
Οι ηλεκτρονικοί πυκνωτές χρησιμοποιούνται ευρέως σε βιομηχανίες όπως η επικοινωνία, ο εξοπλισμός τηλεπικοινωνιών, η ηλεκτρονική αυτοκινήτου, ο βιομηχανικός έλεγχος και τα ψηφιακά κυκλώματα. Χρησιμοποιούνται σε ηλεκτρονικές συσκευές και κυκλώματα σε αυτούς τους τομείς.
Οι ηλεκτρονικοί πυκνωτές μπορούν να χρησιμοποιηθούν για ρύθμιση της τάσης σε κάποιο βαθμό. Μπορούν να συμβάλουν στη σταθεροποίηση των επιπέδων τάσης με το να εξομαλύνουν τις διακυμάνσεις και να μειώνουν τον θόρυβο στα ηλεκτρονικά κυκλώματα. Ωστόσο, για ακριβή ρύθμιση μπορεί να απαιτούνται ειδικές συσκευές ρύθμισης τάσης.
Ναι, οι ηλεκτρονικοί πυκνωτές μπορούν να χρησιμοποιηθούν για προσωρινή αποθήκευση ενέργειας σε ηλεκτρονικά κυκλώματα. Μπορούν να αποθηκεύουν ενέργεια και να την απελευθερώνουν γρήγορα όταν χρειάζεται, αλλά η ικανότητά τους για αποθήκευση ενέργειας είναι συνήθως μικρότερη σε σύγκριση με τις ειδικές συσκευές αποθήκευσης ενέργειας.


2024 © Shanghai King-Tech Electronic Co., Ltd. Πολιτική Απορρήτου